
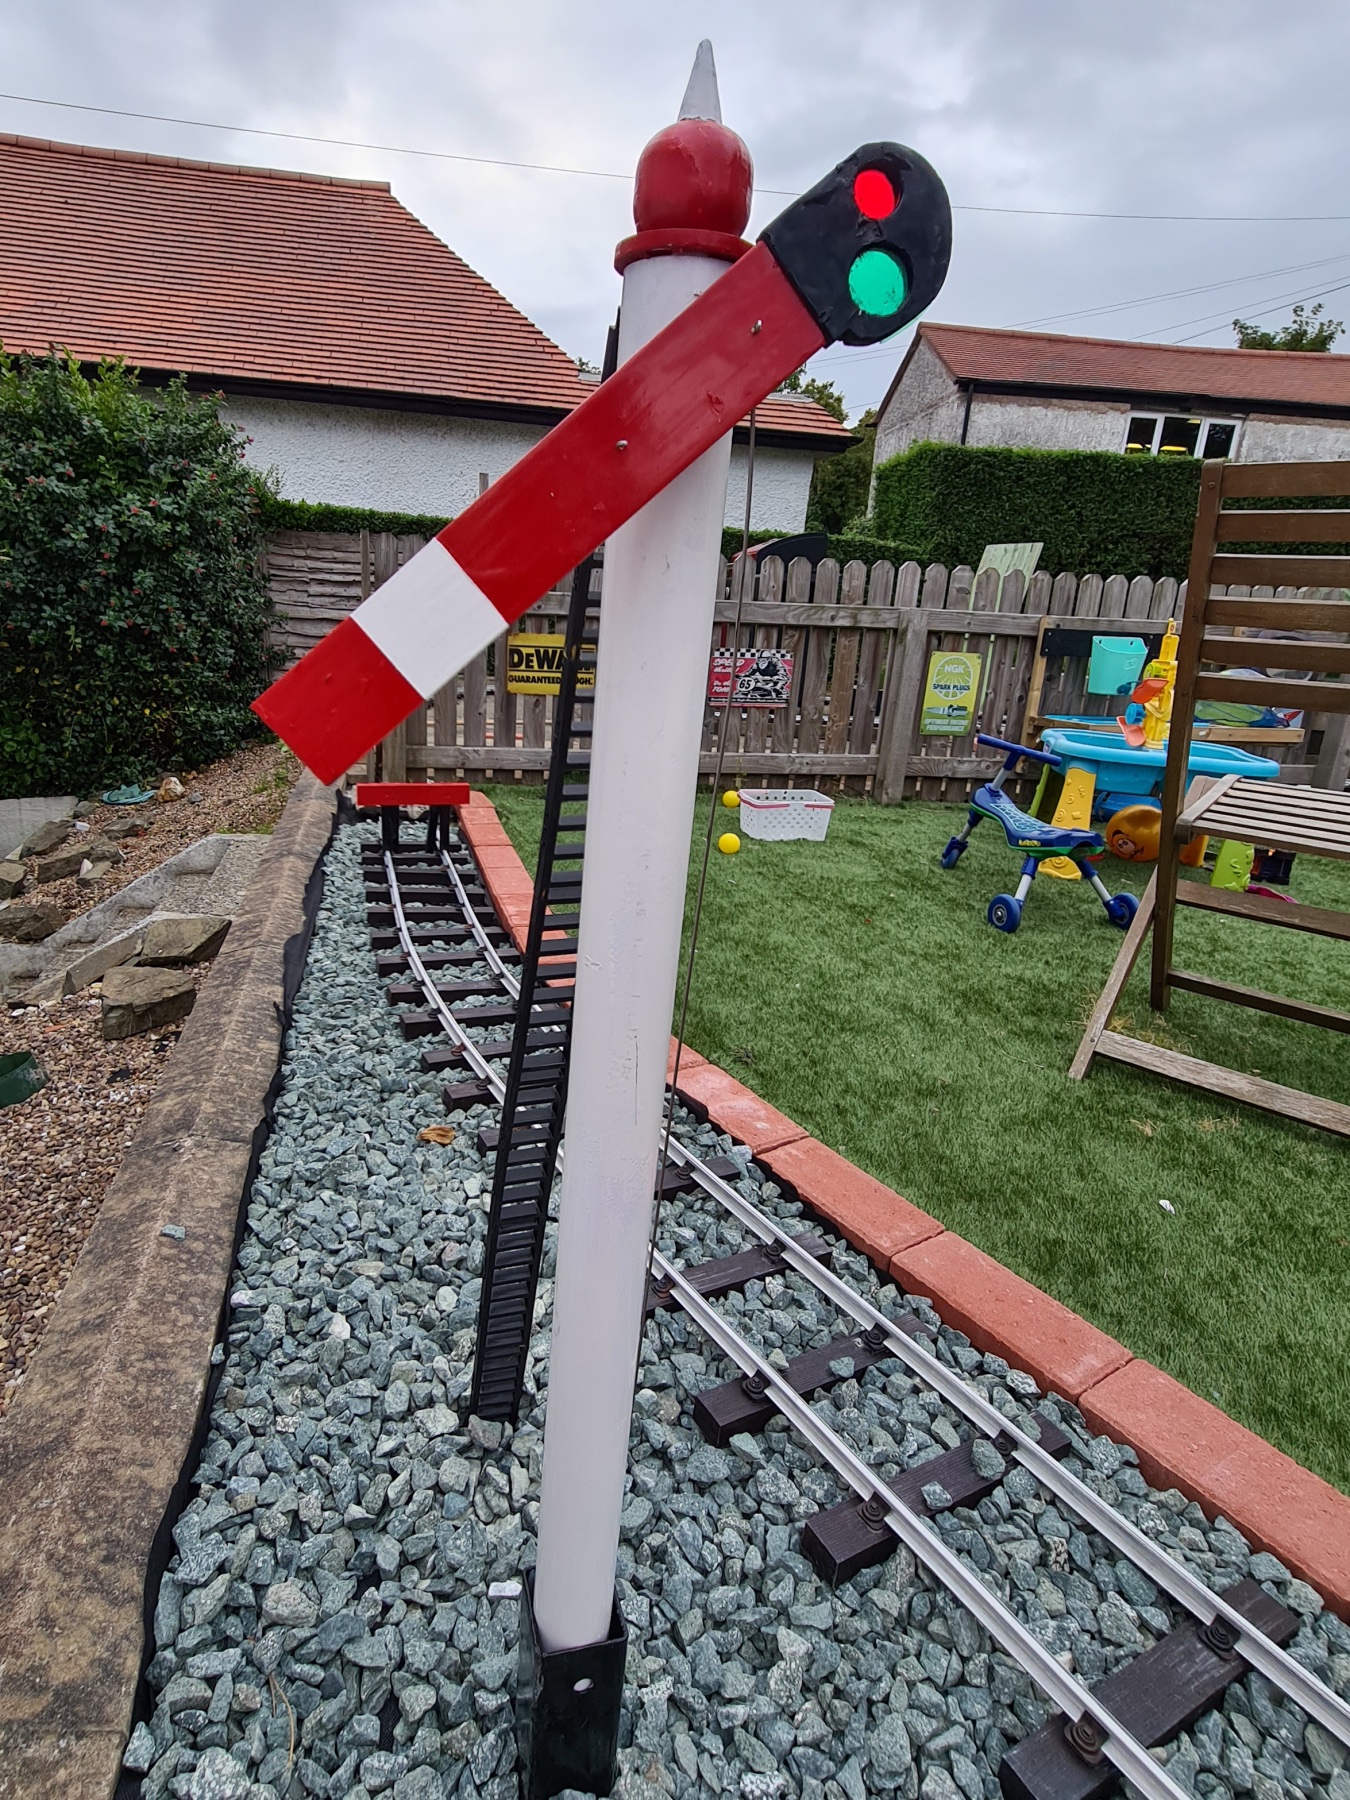
I’ve put together a working semaphore signal for my garden railway. The arm raises when a train passes and resets once it’s gone. It’s not prototypical to any real signal, but it works, it looks the part, and it was a satisfying little project.
The Basic Idea
The system is simple:
- The train’s wheels complete a circuit across the two rails
- A Raspberry Pi Pico detects this
- The Pico moves a servo
- The signal arm moves
When the train clears the detection point, a timeout expires, the Pico checks the circuit again, and if it’s open, the arm resets. If the circuit’s still made (long train, or it’s stopped), the arm stays down and the timer restarts.
The Detection Circuit
This is the bit I wasn’t really sure would work for real, and it worked better than I expected.
Two crocodile clips, one attached to each rail. The Pico monitors the circuit between them. When a metal axle bridges the gap, the circuit completes, and the Pico sees it.
Although it worked fine indoors, when I just manually made the connection between two wires, I thought I’d get a detection range of a few centimetres at most outside. In practice, I can detect a train from several metres away. The conductivity of the (aluminium from PNP Railways) rails is far better than I assumed.
In fact, I had to do a lot more to isolate the track section than I thought, as the train was originally being picked up long before reaching, let alone passing, the signal. For now, I’ve painted the fishplates on the rail to stop them conducting, left more of a gap than normal between the two rails and used plastic bolts to attach fishplate to rail, with each rail either side of the join additionally screwed down to the (plastic) sleepers. This is fine so far for light use in the garden, but likely to be something I’ll revisit.
The Physical Build
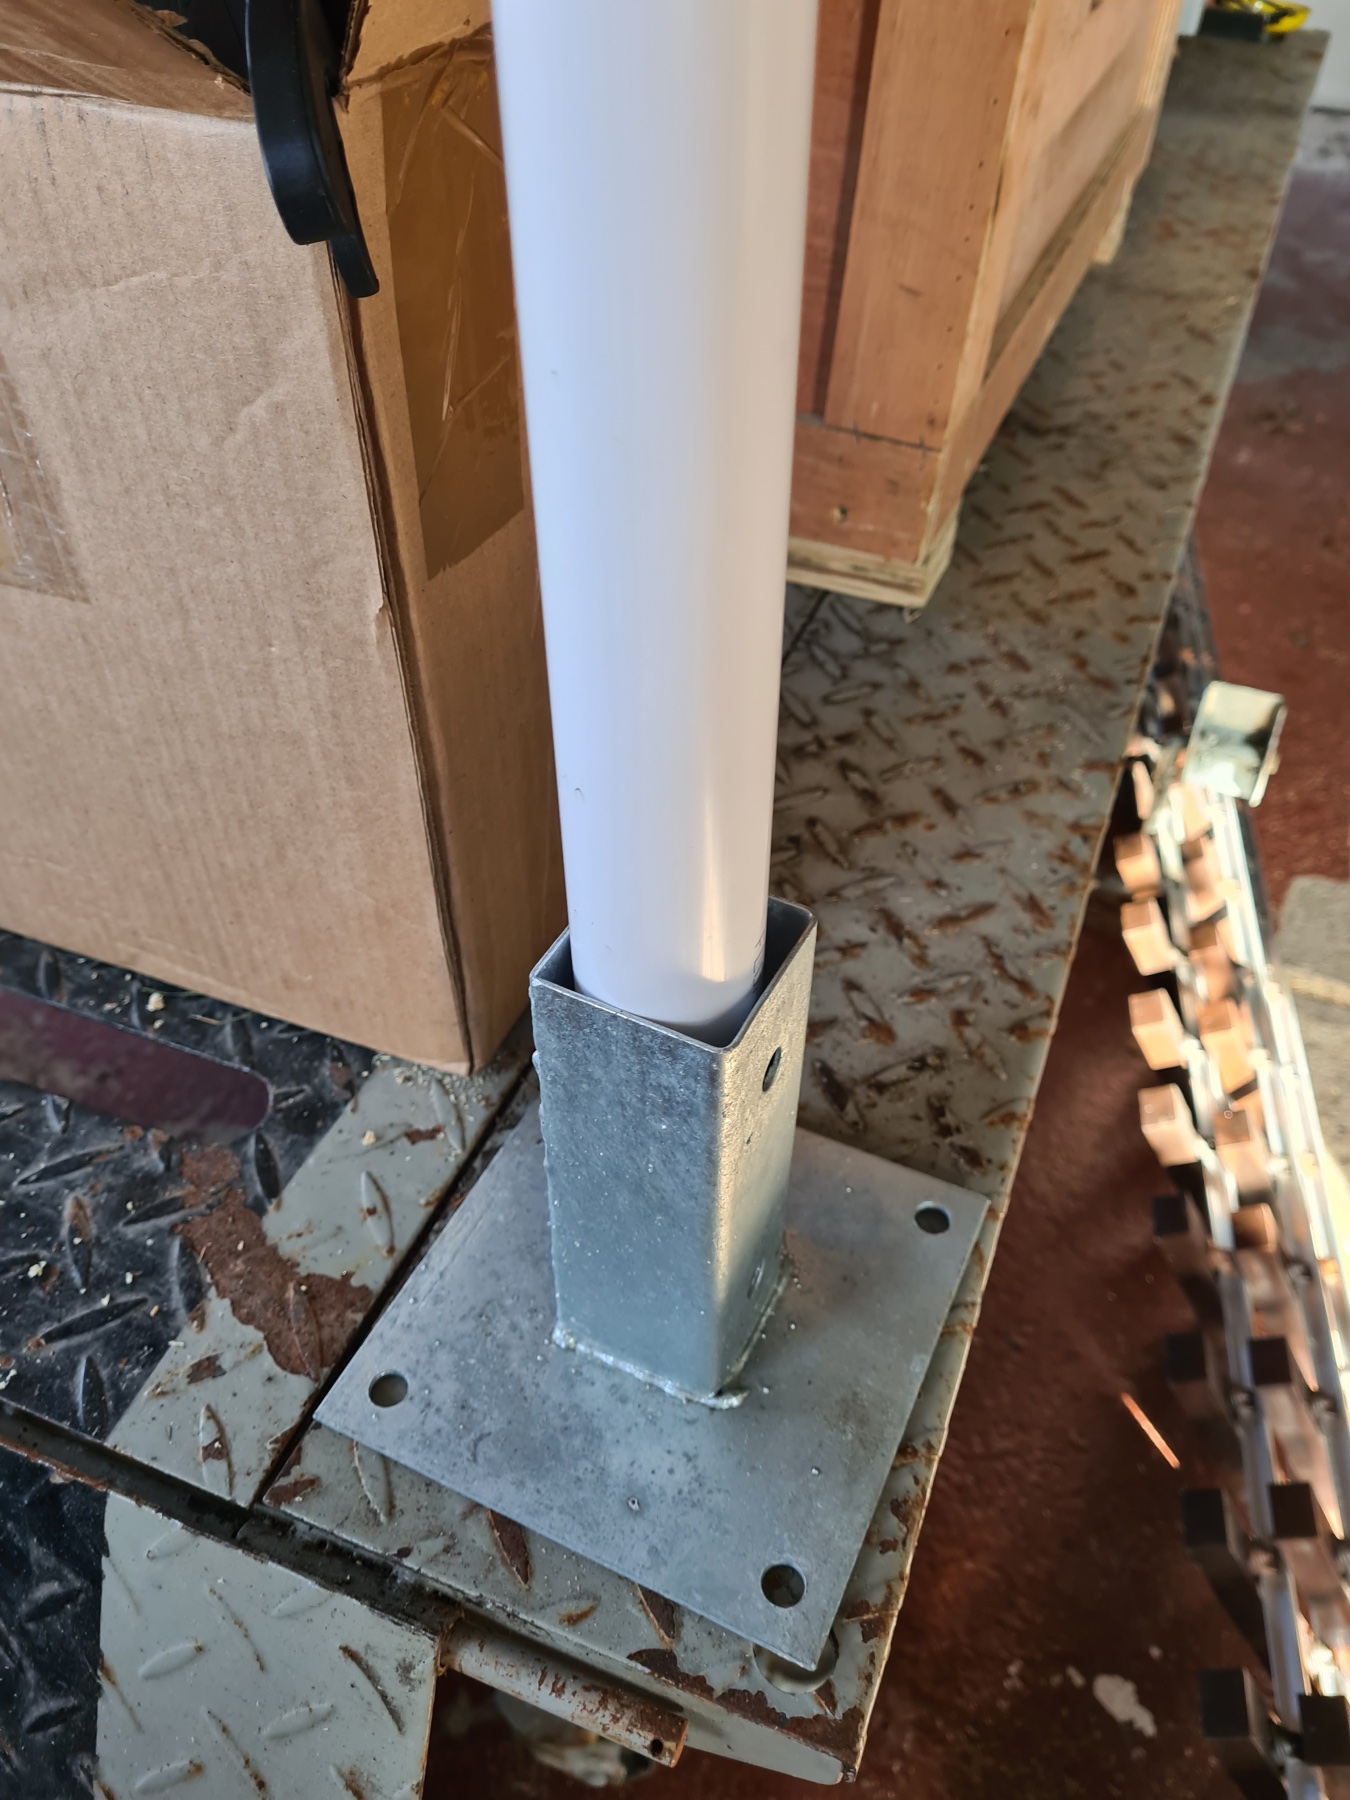
The signal pole is a length of water pipe from B&Q. Nothing fancy – I measured roughly, cut it, and painted it.
For the base, I bought a fence post base which pretty much perfectly fitted the pipe. The pipe and base got a coat of white and black “Hammerite” paint respectively.
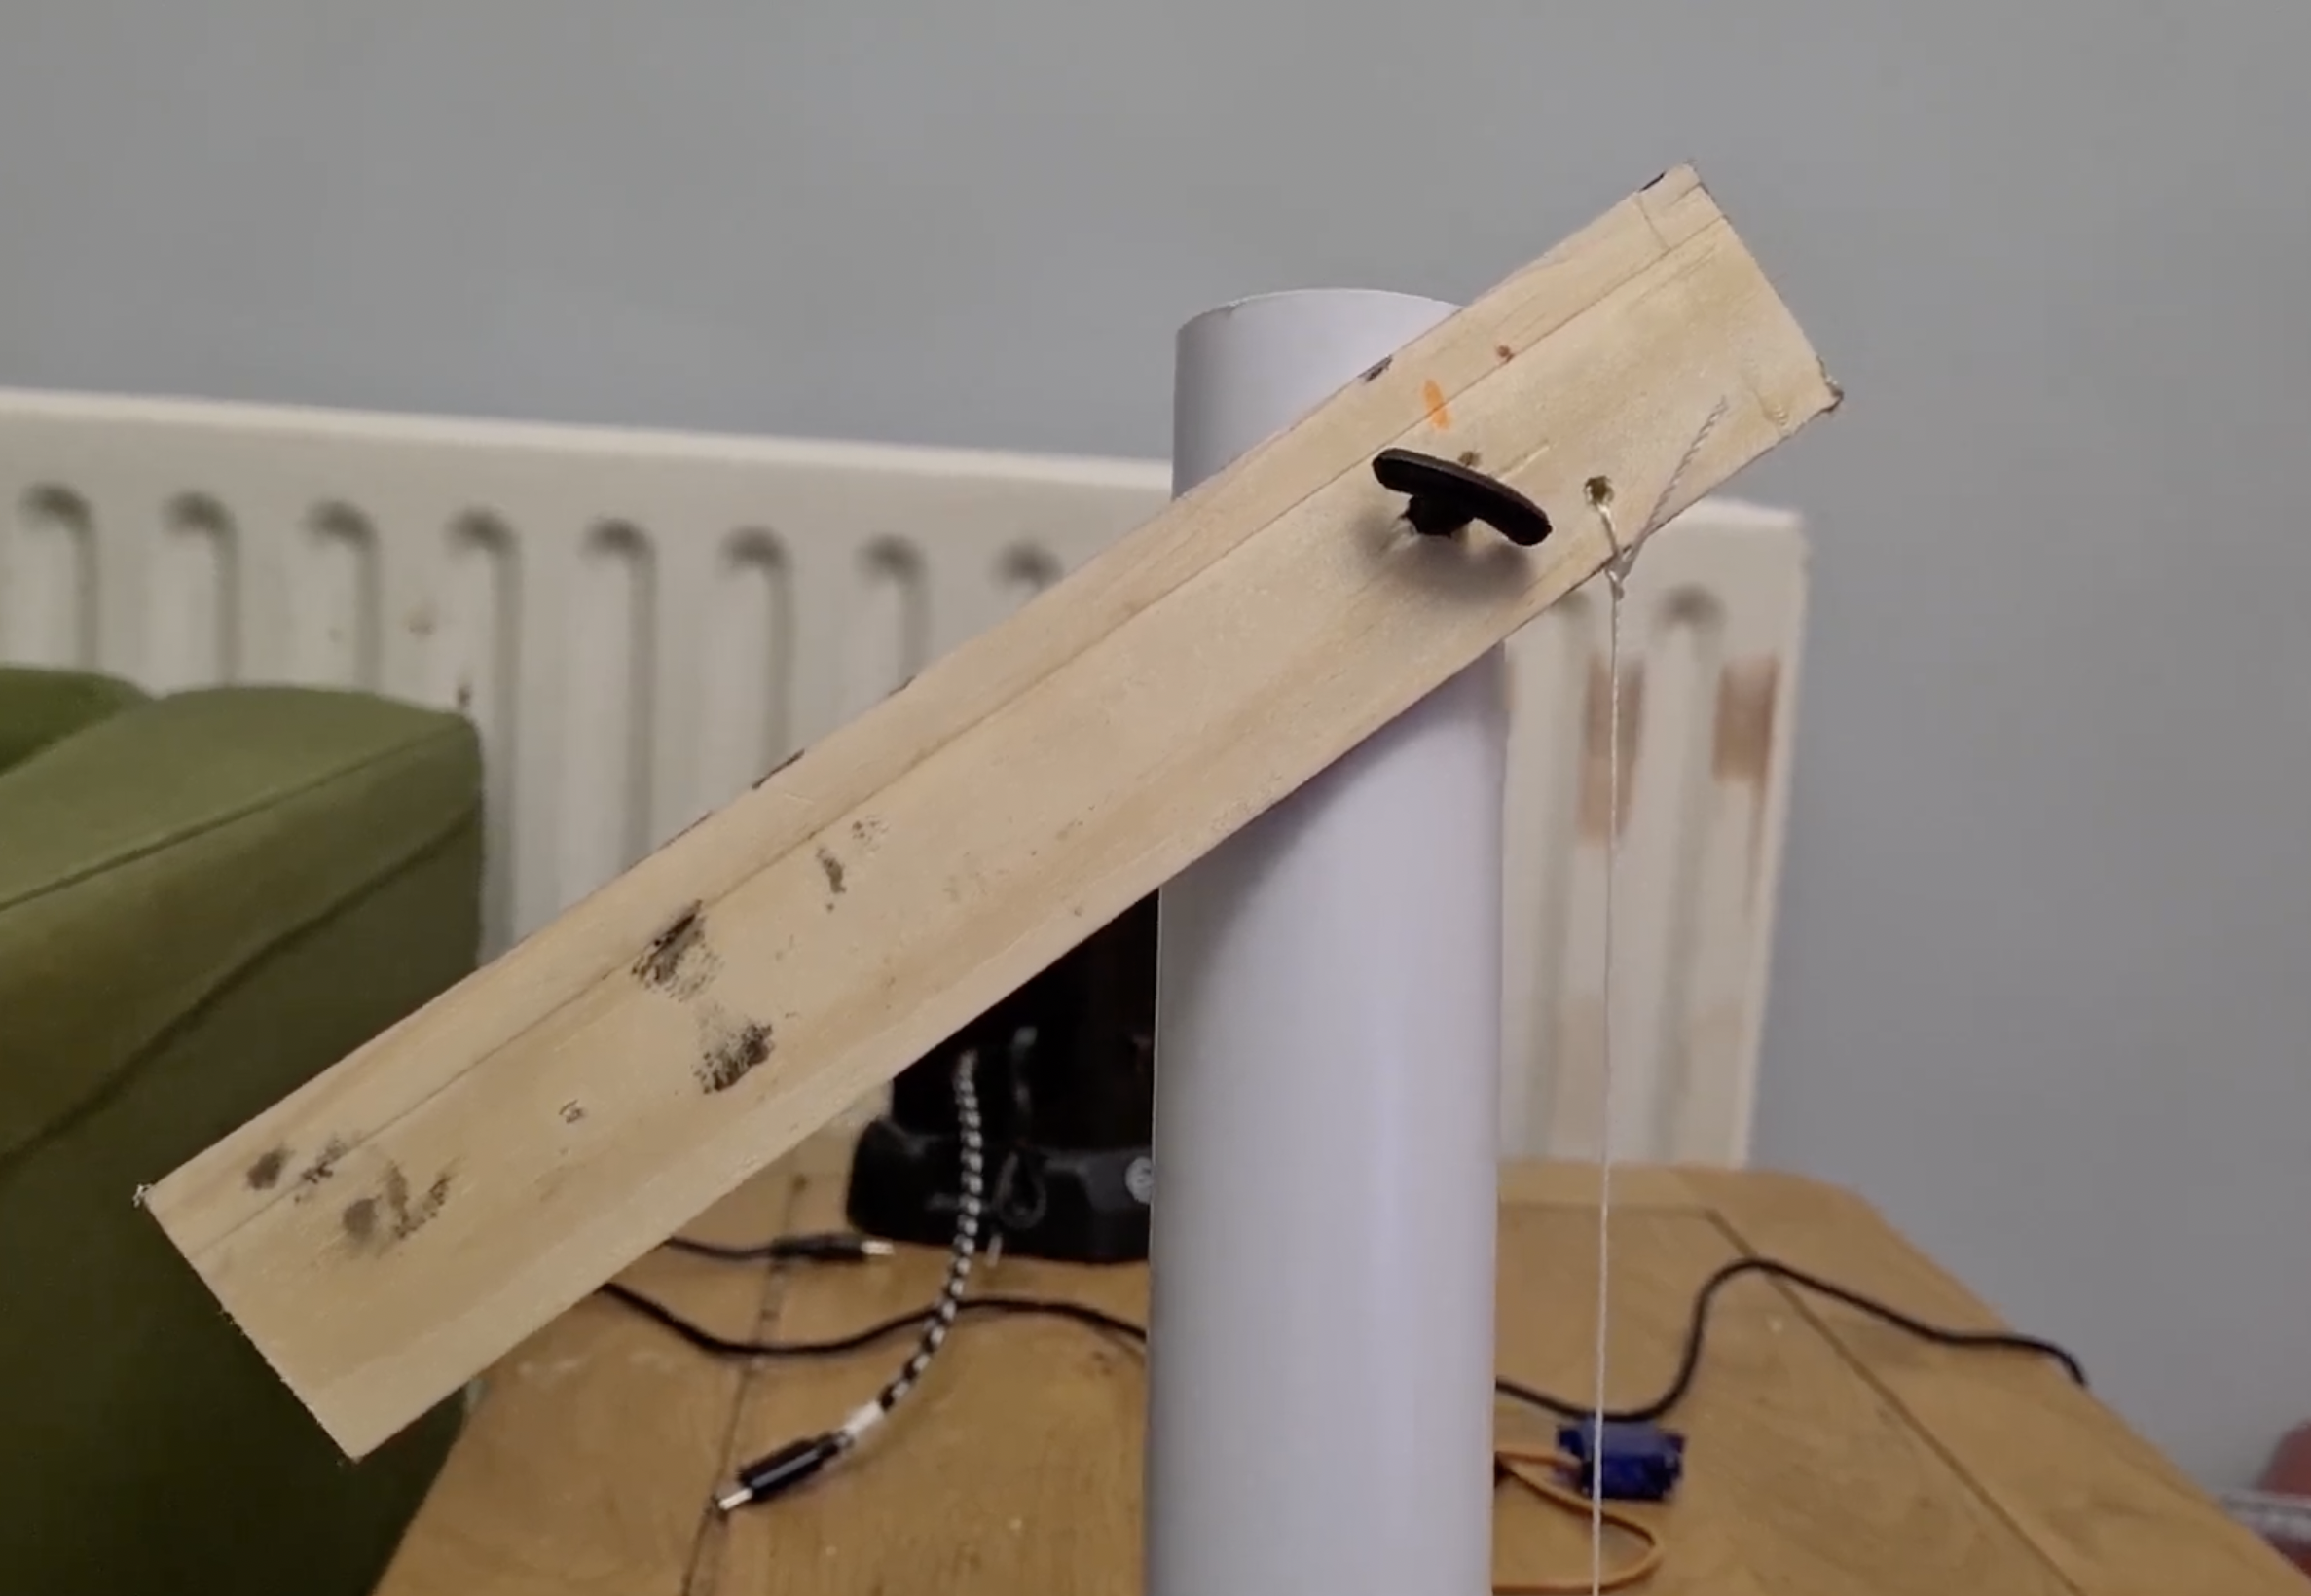
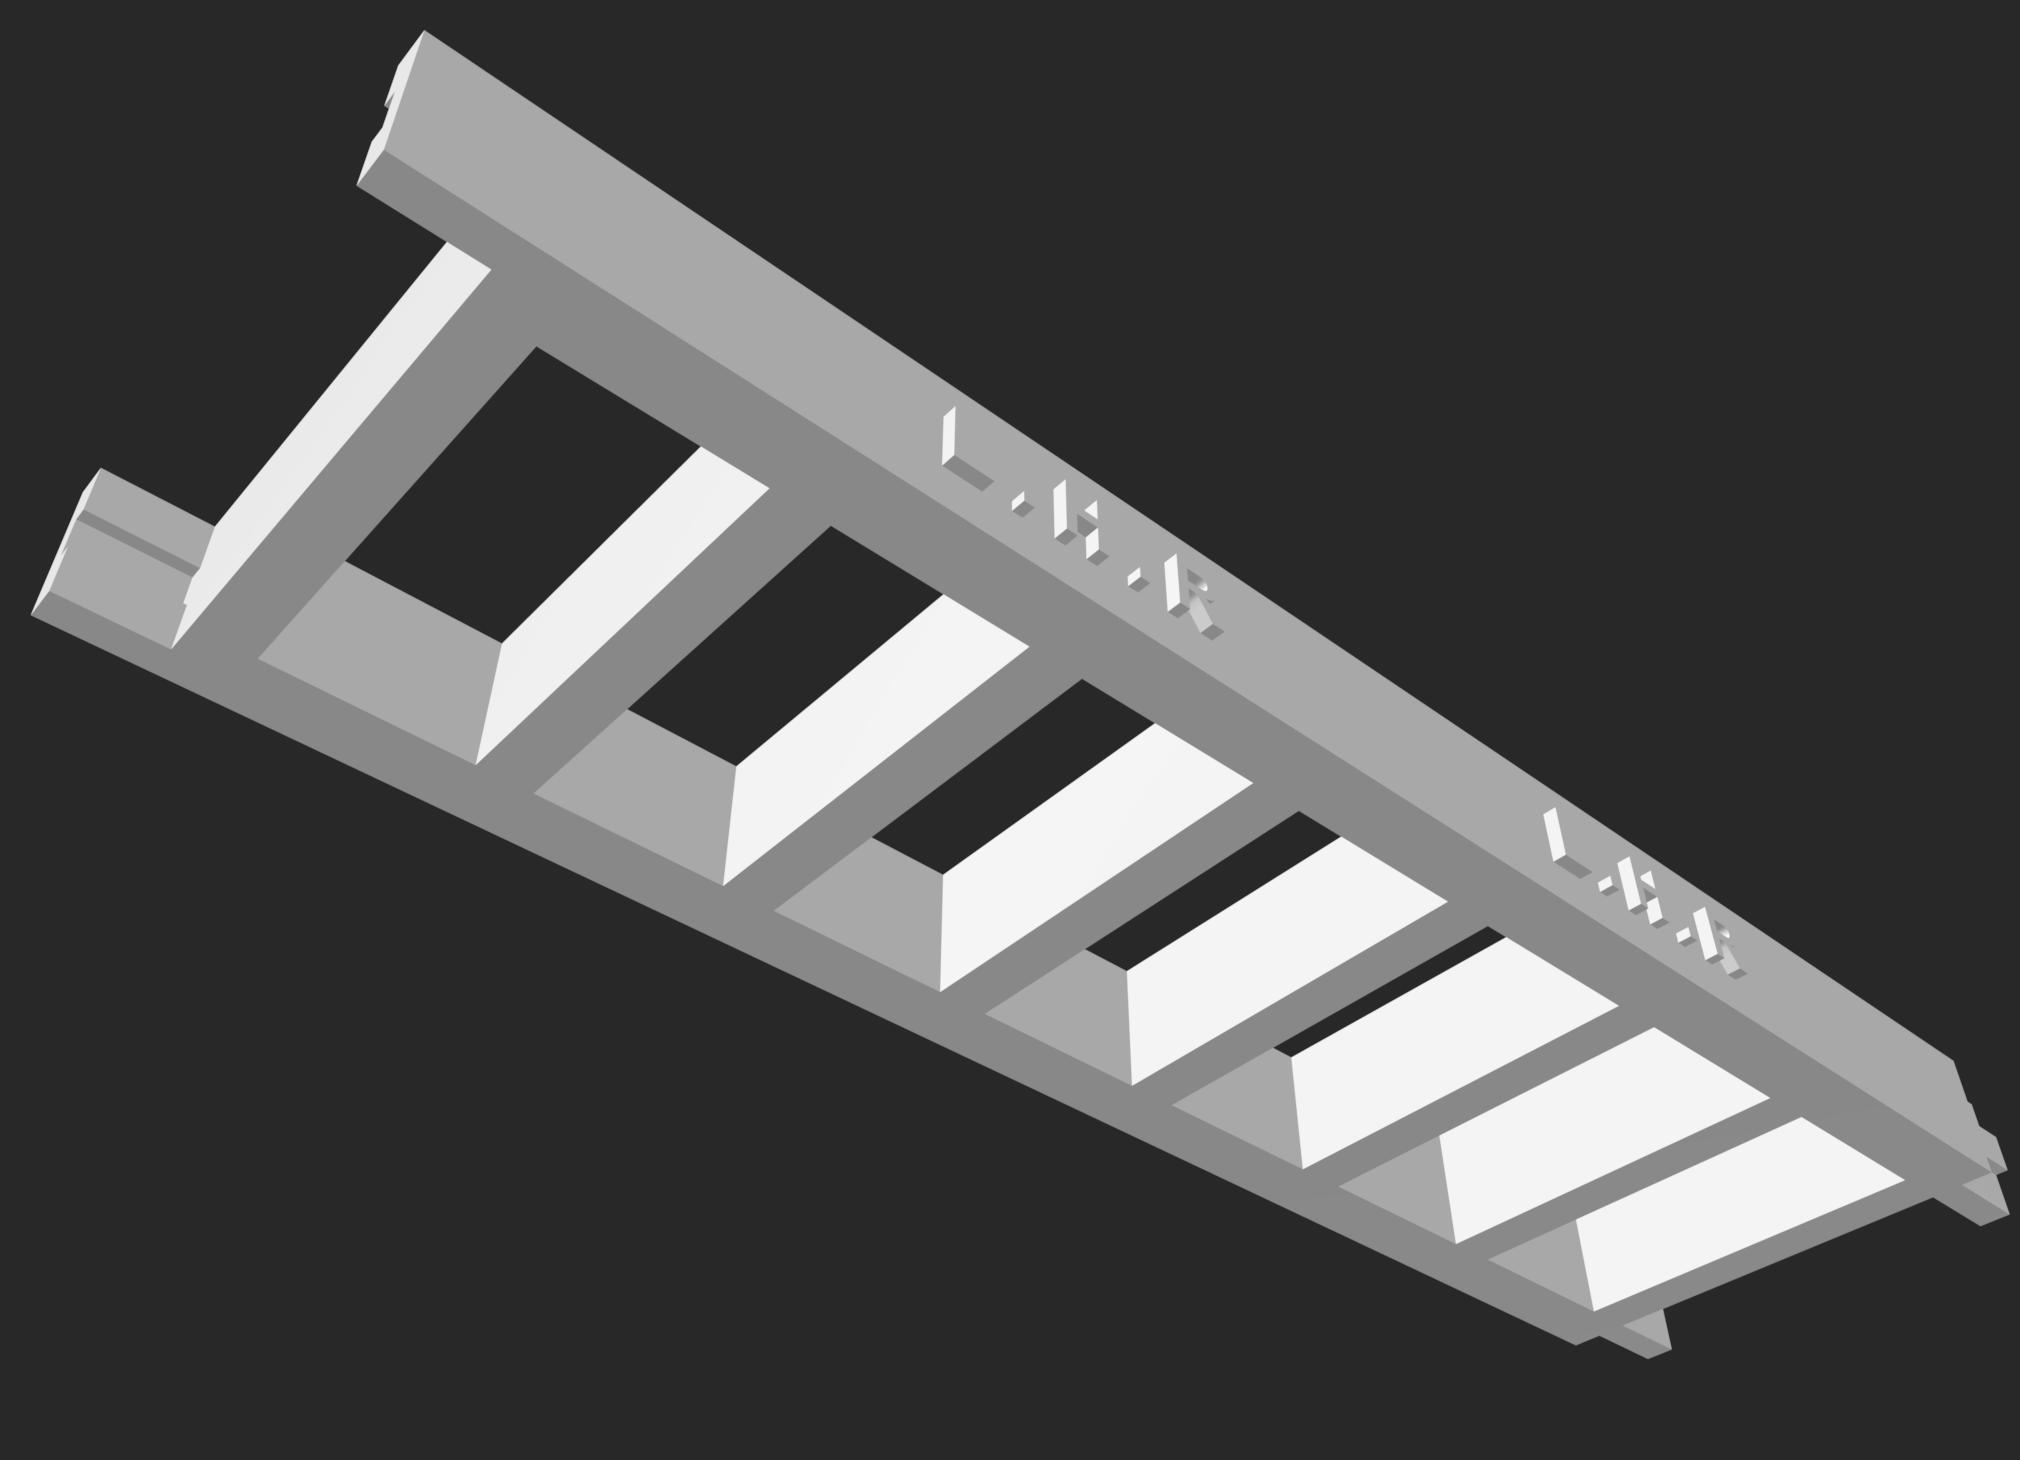
The arm is a piece of wood I cut and painted red and white. At the end, I 3D printed a spectacle plate, with some translucent perspex for the red and green “glass,” which catches the light nicely. I also printed a finial for the top of the pole, because it looked bare without one, and a ladder (in sections, to fit in my printer!).
None of this is accurate to any prototype. I wasn’t trying to replicate a specific real signal. I just wanted something that looked like a signal and worked like a signal.
The Servo and Mounting
The Pico, powered by a small USB power bank, lives inside the pole, which keeps it dry enough for now when in use (proper weatherproofing is a future project…).
The servo sits on the pole, near the bottom. The arm is connected to the servo horn with a length of string. When the Pico triggers the servo, the arm rotates from “clear” to “danger”.
The Code
The MicroPython code is just a handful of lines. Here’s the Gist of it:
Pin 16 is set up as an “escape hatch”, connect it to 3.3V and the loop exits cleanly which is handy for development.
Before entering the main loop, the signal cycles clear-danger-clear-danger. This confirms the servo can move freely and hasn’t got stuck on something, lost power etc.
When the track circuit detects a train, the signal goes to danger and a 5-second cooldown starts. Each loop tick (every 0.1 seconds) decrements the counter. If the train’s still there when it expires, we check again and restart the cooldown. Only when the circuit’s been clear for the full 5 seconds does the servo reset.
The red and green lights are just small LEDs for now, useful for seeing state at a glance while testing. A future version may drive actual signal lamps in the spectacle plate – or as a separate more modern looking colour light signal.
What’s Next
This is version one. It works, but it’s not finished yet. Next steps may include:
- WiFi position reporting. I’ve got a wireless-enabled Pico W. I’d like to have the signal (and future detection points) report train position to a simple dashboard with a track diagram that shows where the train is in real time.
- Weatherproofing. Right now I bring the pico, servo etc in before it rains. I’d like to seal the electronics properly and leave it out.
- Solar charging. The USB power bank works, but I have to remember to charge it. A small solar panel topping up the battery would make this properly self-sufficient.
How are you finding the servo holds up outside? I tried something similar with a cheap SG90 and it started getting sticky after a few months even just sitting under an overhang.